Discover the services we offer
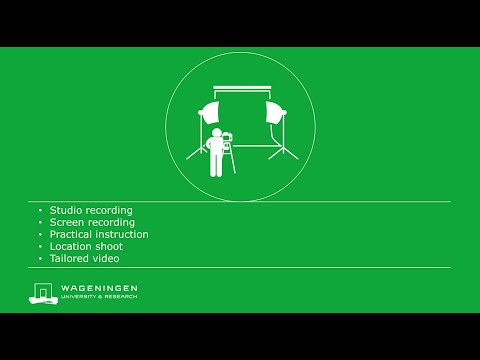
We can roughly distinguish five different types of knowledge clips: a studio recording, a screen recording, a practical instruction, a location shoot and a tailored video. They all have their pros and cons and within these different types there is more room to specify for your goal. Please do not hesitate to contact one of our instructional designers to discuss the possibilities for your course. Once you have decided that you want to make an educational video, you will probably have a good idea of what message you want to deliver. Choosing the right setting or video format for how you will present the information, is key in reaching this goal. Please bear in mind that the different types of video require different amounts of time required from you as a lecturer, and from the Educational Media team.
Videos in other settings or locations than the Dragonfly studio, require more planning and recording time and effort. A lot is possible, but this should be checked and planned well in advance with the Educational Media team. Don't worry! We will see what is possible and guide you through the entire process.
In the video below, the five different types are illustrated:
Studio Recordings
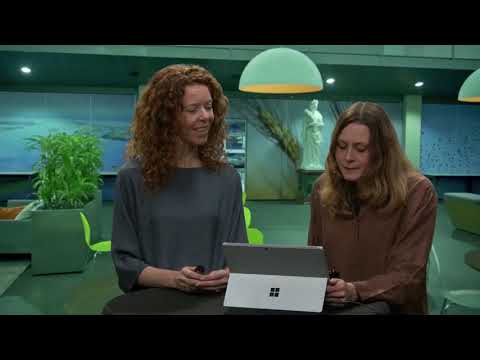
A studio recording is the most common type for educational video. The preparation is relatively short and easy. You start with an intake and, if it is your first recording, follow an online training with feedback from our Instructional Designer. After booking a slot in the agenda, you will be guided through the recording by one of the studio operators. Because the videos are produced as ''one takers'' that do not require post editing, the video will be available the same day. You can use it immediately.
We have a couple of formats to choose from. To choose between any of the formats, it is important to match your personal style, your personal preference, but also to match other knowledge clips within your course or even your department. Also, you can ask the following questions:
- What is the most important to focus on in this clip, the teacher or the PowerPoint or the procedure?
- Do you want the text size and slides to be big enough for mobile devices? (Full screen or screen recording)
- Do you want to spend a little more preparation time to make the slides visually engaging and maybe even interactive with yourself? (Choose a full screen setting).
To make the videos of the WUR as uniform and recognizable as possible, some elements are included in all videos. We make use of standard WUR bumpers (intro and outro animation) which contains the WUR logo. After a few seconds of recording, the name and title of the presenter will appear, which makes it obsolete to introduce oneself.
The formats you can choose from are:
- The Switcher: Switching between slides and presenter
- The Weatherman: Presenter in front of full screen slides (16x9)
- The Classic: Presenter next to slides (4x3)
- The Minimalist: Presenter in front of a single background
- The Late Night Show: Presenter with table and small slides.
In addition it is possible to present with more then one presenter, you can use props or a table, insert a fullscreen video, use a second camera or use a topcamera to film certain actions from above. It is important to let us know when you want to use any of these additional options.
If what you need doesn't fit one of the formats, we can customize the recording to your wishes.

Location Shoot
Filming on location has advantages which might make it the perfect choice for your video. You can film in a relevant setting, show how something works in real life and engage your students by offering an original video.
Practicum Clip
Showing practical instructions in a pre-recorded video has certain advantages over the traditional in class way. You can prepare everything in advance and are sure the final demonstration will show the instructions as they were supposed to. You have more time and attention to devote to the practical itself. You can use the video many times and students can re-watch if they did not follow a specific part the first time.
Field Clip
You can demonstrate something outside and show close-ups of the topic you are talking about.
Interview
Have an interview in a real life setting. Either the final video will highlight the most important parts in a short video, or you get a longer, more in depth, video with the full interview.
One-on-one Conversation
You can have a unscripted discussion with someone. This can be usefull for example for Frequently Asked Questions or to go in depth about a topic with an expert.
Creating a virtual tour
You can use a virtual tour to 'replace' an excursion or field trip, as is done in this showcase. You can also use a virtual tour to show others a specific location, such as a lab, a greenhouse or a recording studio. For a more detailed explanation go to: Creating a virtual tour
Screencast/Podcast
In our Screencast/Podcast Studio you can record a screencast or podcast with high quality microphones, the software Camtasia and a webcam. A screencast is a recording of your screen. This is easy to make and most suitable to explain procedures or programs on a computer. You can create a podcast with up to three speakers.

Animation
Animation is a great tool for educational videos. The possibilities are endless, but in we short offer two types of animation:
- Additional Animation: Animations as addition to your video. For example: animated text, lines, graphs, icons or illustrations on top of your video. With this you can give more information or draw attention to a certain part.
- Full Animation: A fully animated video. Animation simplifies the topic and therefor makes it more clear. Besides you can show things that might not be possible to film.
Tailored videos
If you would like to produce a video that does not fit in the one of the standard formats above, this is often possible although planning, recording and editing takes more time and effort in this case. Contact the Educational Media team to discuss your ideas and the possibilities.
Indication of time
The indicated times that recording and preparations take are estimated and very significantly depending on your experience and the subject. The indications are per knowledge clip.
- Studio recording – 3 to 6 hours of preparation + 1 hour recording
- Screen recording – 1 to 4 hours of preparation + 2 hours recording
- Practical instructions – 3 to 6 hours of preparation + 3 hours recording + editing
- Location shoot – 3 to 8 hours of preparation + 3 hours recording + editing
- Tailored video – preparation up to 10 weeks + recording and editing 2 to 3 weeks

Want to know more about video and podcasts for education?
Please visit:
0 Comments
Add your comment